Every November, hardware stores sell out of heat tape as homeowners rush to prevent the ice dams that destroyed their ceilings last winter. Many install it themselves, assuming they’ve solved their ice dam problem. By February, they’re calling contractors with the same damage—because heat cables only work when installed correctly, used appropriately, and understood as temporary measures rather than permanent solutions.
What Heat Cables Actually Accomplish
Heat tape, heat wire, and heat cables are different names for the same thing: electrical resistance heating elements designed to melt ice and snow in specific roof and gutter locations. The cable generates heat when electricity flows through it, creating a warm path that prevents ice formation or melts existing ice.
These systems don’t prevent ice dams from forming. They create channels through existing ice that allow meltwater to drain rather than backing up under shingles. It’s damage control, not prevention. Understanding this distinction determines whether heat cables will help your situation or waste electricity while providing false security.
How Heat Tape Keeps Gutters and Downspouts Clear
Heat cables installed in gutters warm the metal enough to melt ice and snow accumulation. Instead of gutters filling with solid ice, the heat maintains a channel where water can flow. Similarly, cables running through downspouts prevent these drainage paths from freezing solid.
The cable generates modest heat—typically 5-12 watts per linear foot. This isn’t enough to melt heavy snow rapidly. Instead, it maintains drainage pathways during freeze-thaw cycles. When afternoon sun melts snow on your roof, that meltwater needs somewhere to go. Heat cables keep gutters and downspouts functional so water can escape rather than refreezing into ice dams.
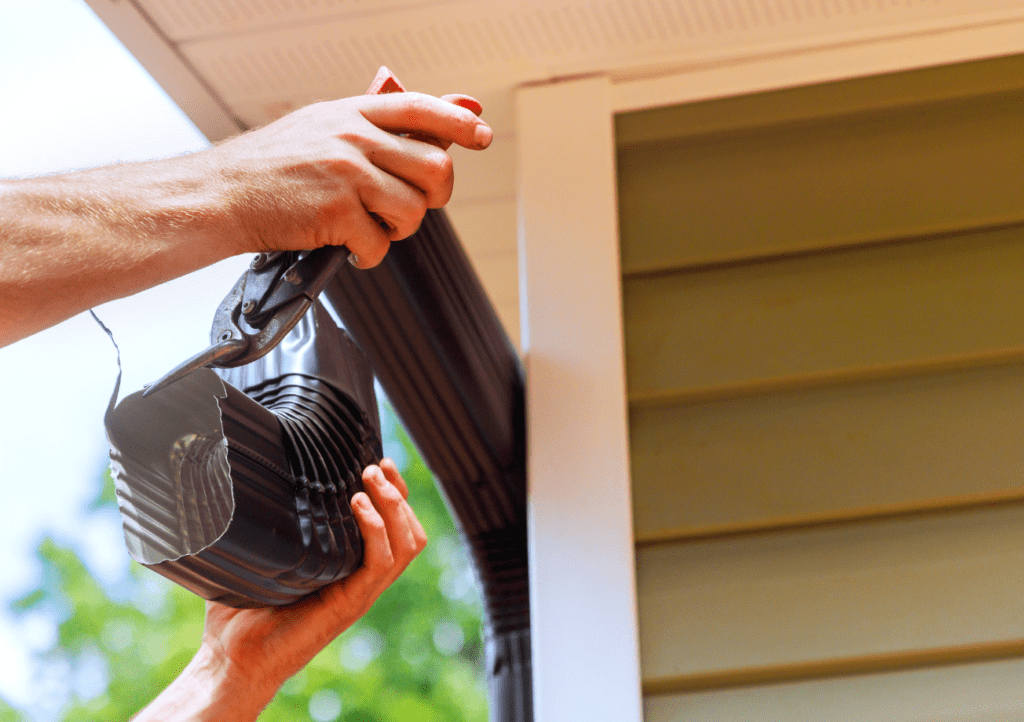
Proper gutter installation runs cable along the bottom of gutters in a zigzag pattern that covers the gutter width. The cable continues down through downspouts to ground level, creating a continuous warm path from roof edge to ground.
Many DIY installations fail because they run cable in straight lines instead of zigzag patterns, stop cable partway down downspouts, or don’t extend cable onto the roof surface where ice dams actually form.
Roof Edge Heating vs. Gutter Heating Systems
The Critical Difference
Installing heat cable only in gutters addresses symptoms, not causes. Ice dams form on the roof surface above gutters when melting snow refreezes at cold eaves. Gutter heat cables might keep gutters clear, but ice dams still form on the roof itself, backing water under shingles before it ever reaches the gutters.
Effective systems must address both roof edge ice dam formation and gutter ice accumulation.
Comprehensive Roof Edge Systems
Professional installations extend heat cable up onto the roof surface, creating ice-free pathways from several feet up the roof, through gutters, and down downspouts. The typical pattern runs cable in zigzag or loop configurations extending 2-4 feet up from the roof edge.
This roof surface coverage prevents ice dam formation in the critical eave area where most ice dams develop. The zigzag pattern typically extends 12-24 inches into the roof surface at each bend, creating multiple drainage pathways.
Valley and Complex Area Coverage
Roof valleys—where two roof planes meet—require special attention. Snow and ice accumulate heavily in valleys, and meltwater flows concentrate there. Heat cable should run the entire length of valleys, creating clear drainage channels.
Inside corners, dormers, and other architectural features that trap snow also benefit from dedicated heat cable runs. Effective systems identify these problem areas during installation planning rather than adding cable reactively after ice dams form.
Electrical Requirements and Safety Considerations
Power Requirements and Circuit Capacity
Heat cable draws significant electrical current. A typical 100-foot installation might draw 6-8 amps continuously when operating. Homes with 200 feet of cable could draw 15-20 amps—requiring dedicated circuits.
Never plug heat cables into standard household circuits already serving other loads. The continuous draw can overload circuits, trip breakers, or create fire hazards. Professional installations include electrical load calculations and often require dedicated circuits with GFCI protection.
GFCI Protection Requirements
All heat cable systems must include ground fault circuit interrupter (GFCI) protection. These devices detect electrical leakage and shut off power immediately, preventing electrocution hazards. Installing heat cables without GFCI protection violates electrical codes and creates serious safety hazards.
Cable Quality and Installation Safety
Use only heat cables specifically designed and UL-listed for roof and gutter applications. Cheap, non-listed cable from unknown manufacturers represents serious fire and electrocution risks.
Proper installation requires specific techniques:
- Cables secured with clips that don’t penetrate the cable itself
- Cables laid flat, never stretched tight across sharp edges
- Cables never bundled or coiled, which creates concentrated heat
Maintenance Requirements for Winter Use
Pre-Season Inspection and Testing
Before each winter, inspect all heat cable carefully. Look for damaged insulation, cracked outer jackets, or kinked sections. Test cable with a multimeter before installation, verifying resistance values match manufacturer specifications.
Check all electrical connections, ensuring GFCI outlets function properly and connections remain weatherproof. Damaged cable must be replaced entirely—repairs aren’t safe or reliable.
During-Season Monitoring
Heat cable should only operate when needed—when temperatures hover near freezing and snow/ice conditions exist. Operating cable during extreme cold (-10°F and below) wastes electricity without providing benefit. Similarly, operating cable when temperatures are well above freezing (40°F+) wastes electricity melting snow that would melt naturally.
Smart controllers or manual operation based on weather conditions optimizes effectiveness and minimizes energy costs.
Seasonal vs. Year-Round Installation
Some homeowners install heat cable seasonally, removing it each spring. This prevents UV degradation but requires annual installation labor. Others install cable permanently, leaving it in place year-round. This works if cable is high quality, but expect 3-5 year cable lifespan due to UV exposure and thermal cycling.
When Heat Cables Work and When They Don’t
Effective Applications
Heat cables work well for:
- Homes with minor ice dam problems during specific weather conditions
- Supplementing proper insulation and ventilation that can’t completely prevent ice dams
- Protecting specific vulnerable areas like valleys or complex roof sections
- Keeping gutters and downspouts functional during freeze-thaw cycles
When Heat Cables Aren’t the Solution
Heat cables won’t solve:
- Severe ice dam problems caused by inadequate insulation or ventilation
- Ice accumulation on entire roof surfaces
- Structural problems or improper roof design
Energy Cost Reality
Heat cable costs approximately $0.10-0.25 per linear foot per hour to operate. A 200-foot system running 12 hours daily for 60 days costs $150-450 per season. For severe ice dam situations requiring constant operation, costs increase substantially.
Compare these ongoing costs to addressing root causes through insulation and ventilation improvements. Heat cables might cost less initially but create recurring expenses. Proper insulation and ventilation cost more upfront but solve problems permanently while reducing heating costs.
Your Decision Framework
Consider heat cables if:
- You have specific problem areas despite adequate insulation
- You need temporary protection while planning permanent solutions
- Your roof design creates unavoidable vulnerable areas
- You understand this requires monitoring and electricity costs
Skip heat cables and address root causes if:
- You have severe, widespread ice dam problems
- Your attic insulation is inadequate (less than R-38)
- Your attic ventilation is poor or blocked
- You’re looking for permanent solutions
Essential requirements for effectiveness:
- Professional installation or meticulous DIY following manufacturer specifications
- Dedicated GFCI-protected electrical circuits
- Seasonal monitoring and maintenance
- Realistic expectations about what heat cables can and can’t accomplish
Take Action
Before installing heat cables, have your attic insulation and ventilation assessed. Many ice dam problems disappear with proper insulation upgrades that also reduce heating costs.
If you proceed with heat cable installation, hire licensed electricians for electrical work and experienced roofers for cable placement. Budget for ongoing electrical costs and periodic cable replacement.
Heat tape and heat wire provide valuable tools for managing ice dam risks when used appropriately. They work best as supplements to proper building envelope performance, not replacements for it.